Your core supports your entire body. Whether you’re an athlete or someone with a desk job, core workouts enhance your everyday life. Your core supports your spine, allows your limbs to move freely without your body collapsing, and provides the stability you need for balance and movement.
The core is made up of four main muscles. The rectus abdominis, often called the “six-pack,” runs vertically along the front of the abdomen and helps flex the spine, stabilize the pelvis, and assist with breathing. The external obliques, located on the sides of the abdomen, enable rotation, side bending, and provide abdominal compression.
Beneath them are the internal obliques, which work in the opposite direction to assist with similar movements while supporting the abdominal wall. The transversus abdominis (TVA) is the deepest layer, wrapping around the abdomen like a corset to stabilize the core and spine, support internal organs, and aid in posture. Additional muscles, including the erector spinae, pelvic floor, diaphragm, and gluteal muscles, also play crucial roles in core strength. Together, these muscles ensure a strong and functional core.
Understanding the structure and function of your core highlights just how crucial it is to keep these muscles strong and engaged. Now, let’s explore a few effective exercises that target each area of your core to build strength, stability, and endurance.
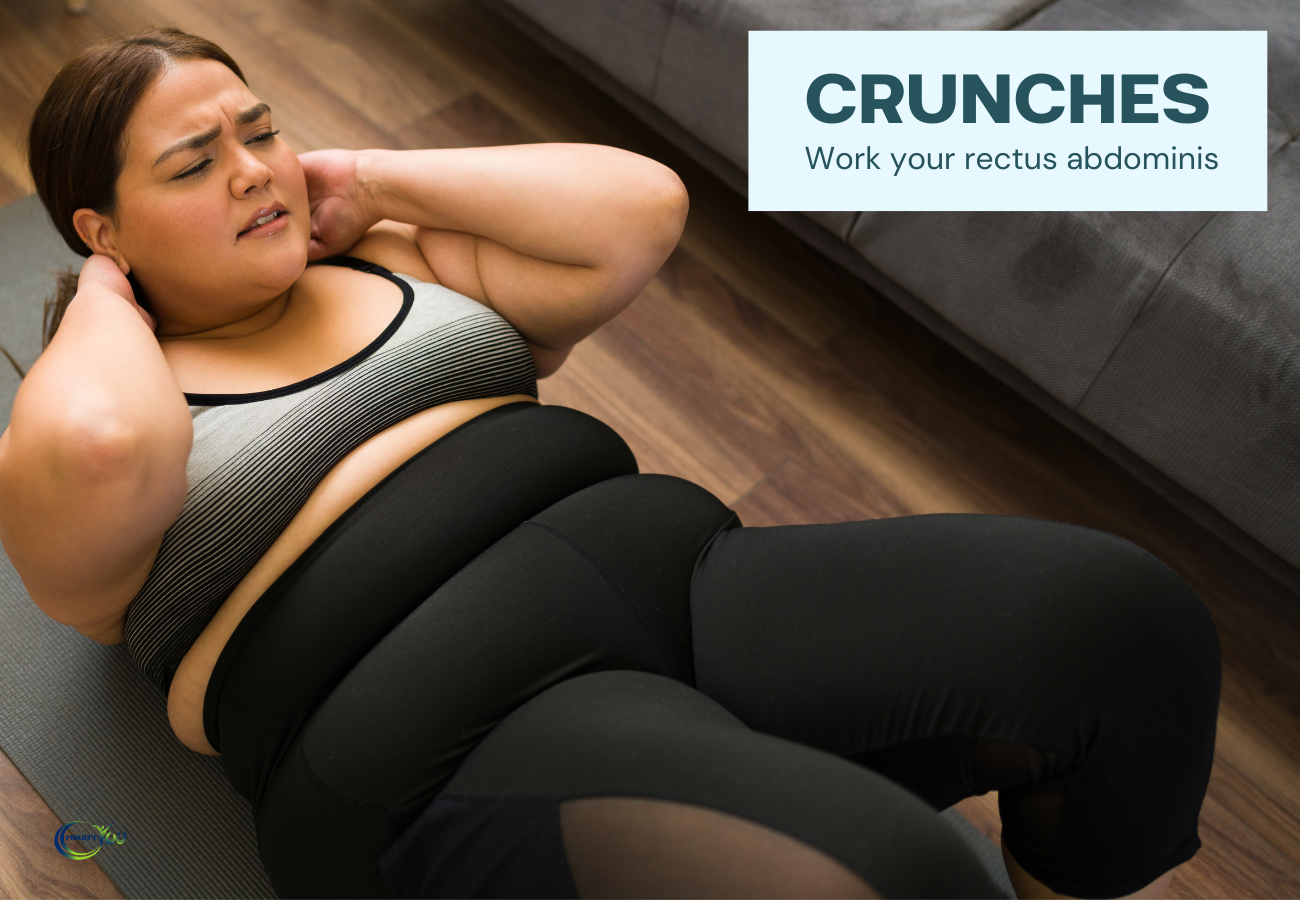
1. Setup Position
- Lie on your back on an exercise mat or flat surface for comfort.
- Bend your knees and place your feet flat on the ground, hip-width apart.
- Rest your arms in one of these positions:
- Crossed over your chest.
- Hands gently supporting your head (without pulling on your neck).
2. Engage Your Core
Tighten your abdominal muscles by pulling your belly button in toward your spine.
Keep your back flat on the ground.
3. Perform the Crunch
Exhale as you lift your upper body slightly off the ground.
Focus on using your abdominal muscles rather than your neck or shoulders to lift.
Your shoulder blades should come off the ground, but your lower back stays in contact with the mat.
Keep your neck in a neutral position; avoid tucking your chin into your chest.
4. Pause at the Top
Hold the top position for 1–2 seconds, feeling your core muscles engage.
Avoid pulling with your hands if they’re behind your head; let your abs do the work.
5. Return to Starting Position
Inhale as you slowly lower your upper body back to the ground in a controlled motion.
Keep your core engaged as you descend.
6. Repeat
Perform 10–15 repetitions for 2–3 sets, depending on your fitness level.
Focus on quality over quantity to avoid strain.
Tips for Proper Form:
Avoid jerky movements; crunches should be slow and controlled.
Keep your feet flat and avoid lifting them off the ground during the movement.
Avoid pushing your head or straining your neck.
Breathe consistently: exhale on the way up, inhale on the way down.
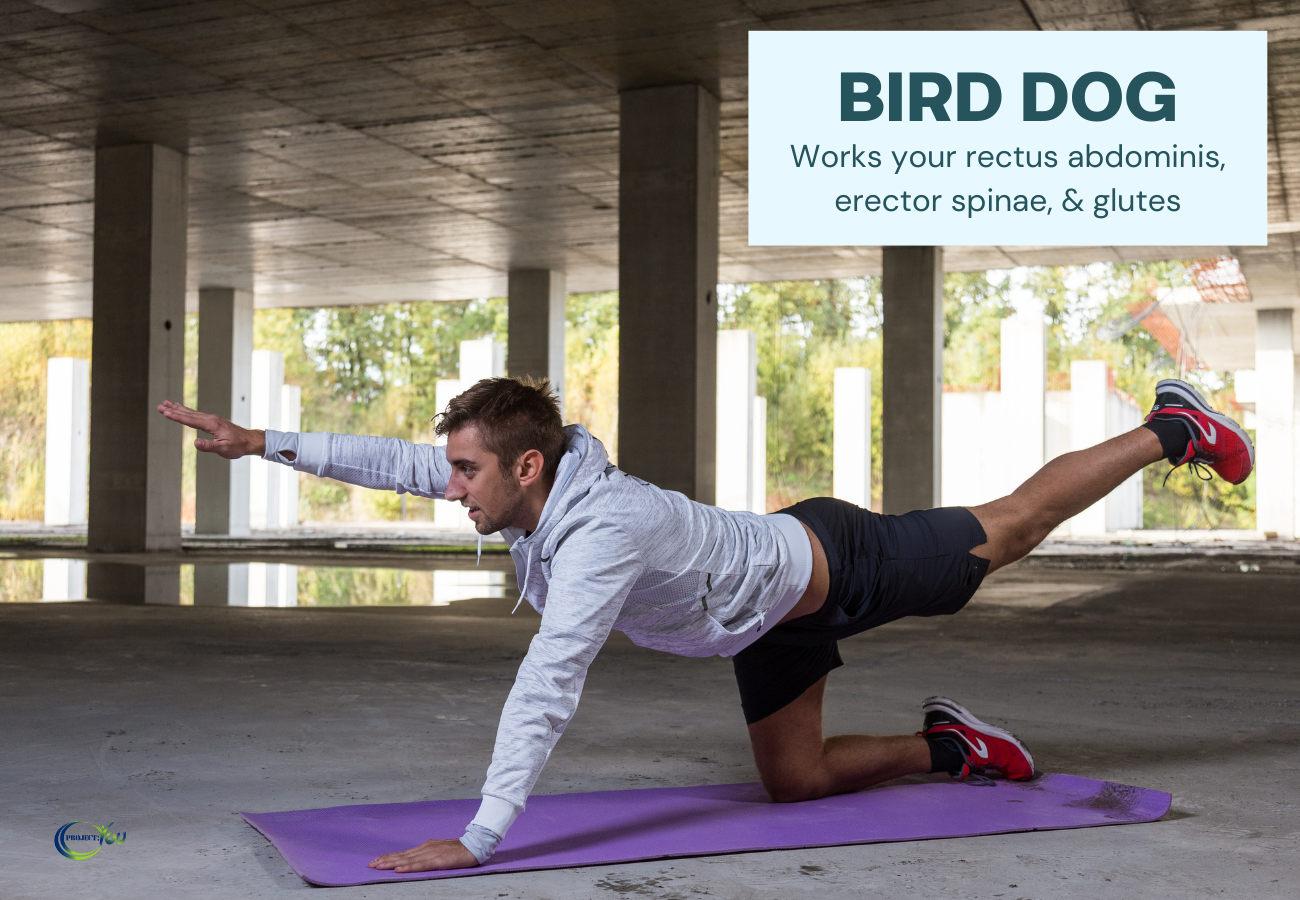
1. Setup Position
- Start on your hands and knees on a flat surface or exercise mat.
- Position your hands directly under your shoulders and knees under your hips.
- Keep your back flat and your neck in a neutral position.
2. Engage Your Core
- Tighten your abdominal muscles to stabilize your torso.
3. Extend Opposite Arm and Leg
- Slowly lift and extend your right arm forward and your left leg straight back.
- Keep both parallel to the ground without letting your hips tilt.
4. Pause at the Top
- Hold the position for 2–3 seconds, focusing on maintaining balance.
5. Return to Starting Position
- Slowly bring your arm and leg back down without losing control.
6. Repeat on the Other Side
- Alternate sides for 10–12 repetitions on each side.
Tips for Proper Form
- Avoid arching your lower back or twisting your hips.
- Move slowly to maintain control and improve stability.
- Keep your gaze slightly forward to maintain neck alignment.
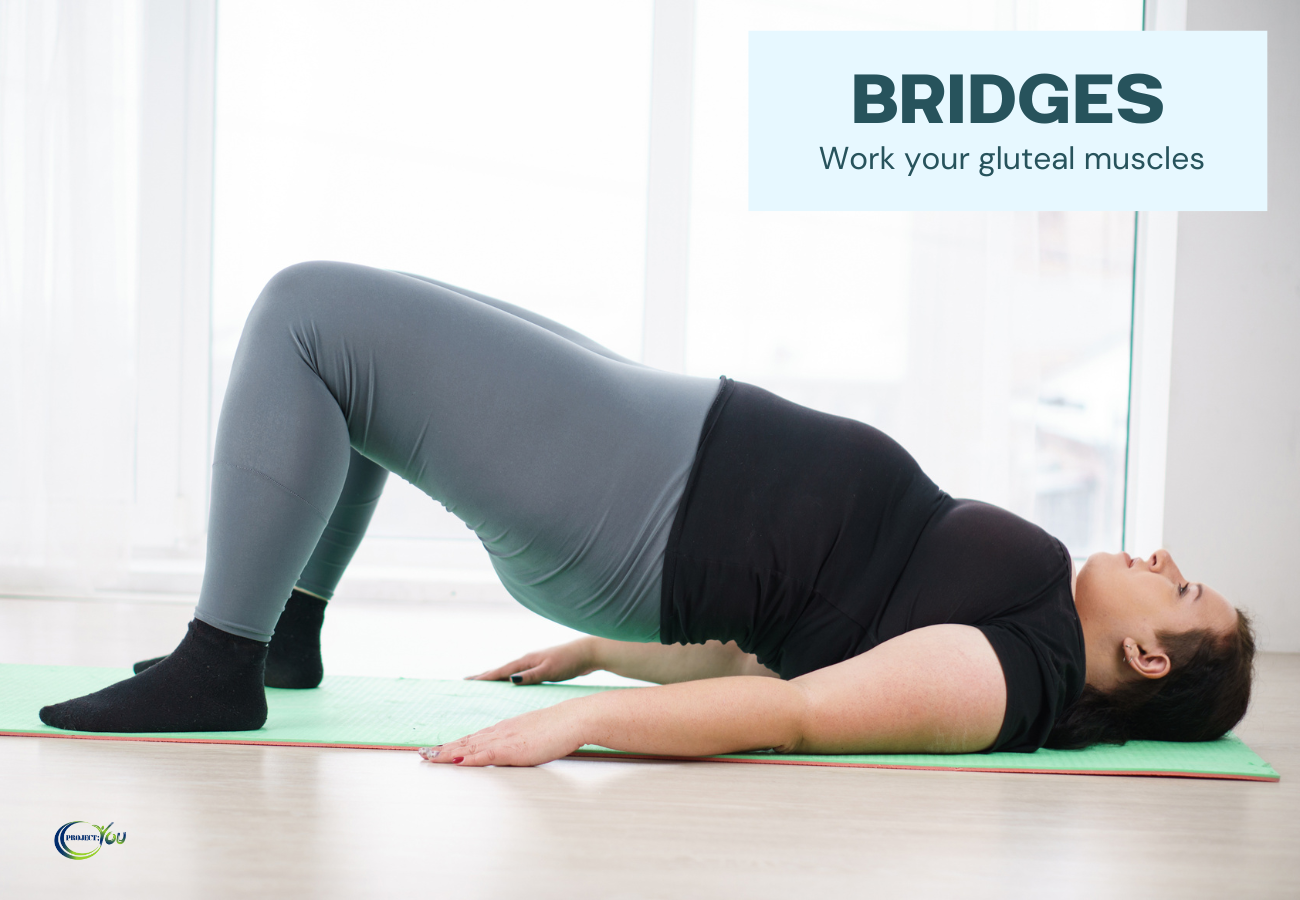
1. Setup Position
- Lie flat on your back with your knees bent and feet flat on the floor, about hip-width apart.
- Place your arms at your sides with palms facing down.
2. Engage Your Core and Glutes
- Tighten your core and squeeze your glutes to prepare for the movement.
- Lift Your Hips
- Press through your heels to lift your hips off the ground.
- Form a straight line from your knees to your shoulders at the top.
3. Pause at the Top
- Hold the lifted position for 2–3 seconds, squeezing your glutes.
4. Lower Back Down
- Slowly lower your hips back to the starting position, but don’t fully relax.
5. Repeat
- Perform 10–15 repetitions for 2–3 sets.
Tips for Proper Form
- Avoid overextending your lower back.
- Keep your feet firmly planted and your knees aligned with your hips.
- Don’t rush; focus on controlled, smooth movements.
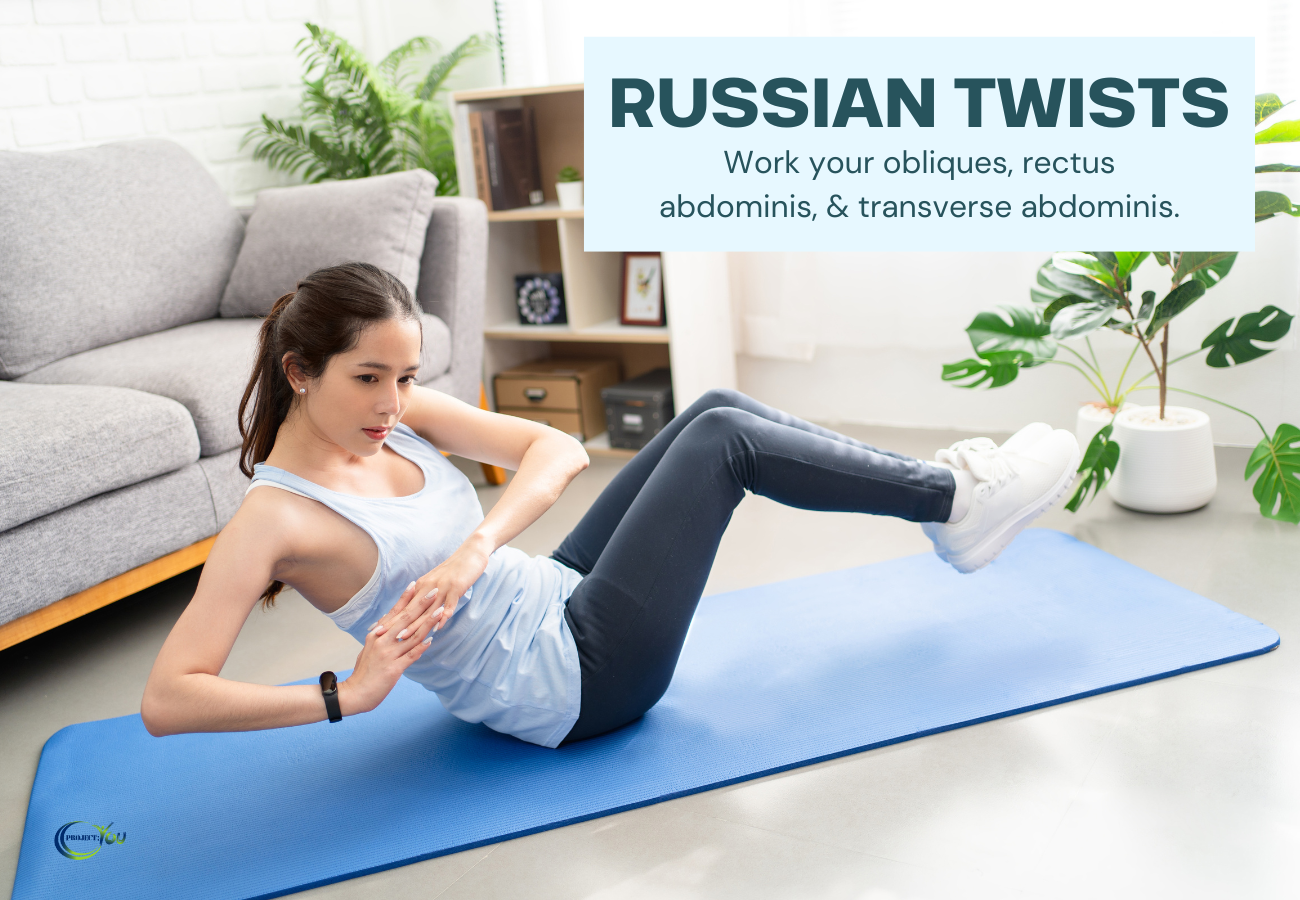
1. Setup Position
- Sit on the floor with your knees bent and feet flat.
- Lean back slightly, forming a V-shape between your torso and thighs.
- Hold a weight, like a medicine ball or dumbbell, or clasp your hands together.
2. Engage Your Core
- Tighten your abs to keep your torso stable and spine straight.
3. Twist Side to Side
- Rotate your torso to the right, bringing your hands (or weight) beside your hip.
- Return to the center and twist to the left.
4. Keep Your Balance
- Lift your feet slightly off the ground for added difficulty.
5. Repeat
Perform 10–15 twists per side for 2–3 sets.
Tips for Proper Form
- Avoid rounding your back; keep your chest lifted.
- Control the movement to avoid swinging or using momentum.
- Breathe steadily throughout the exercise.
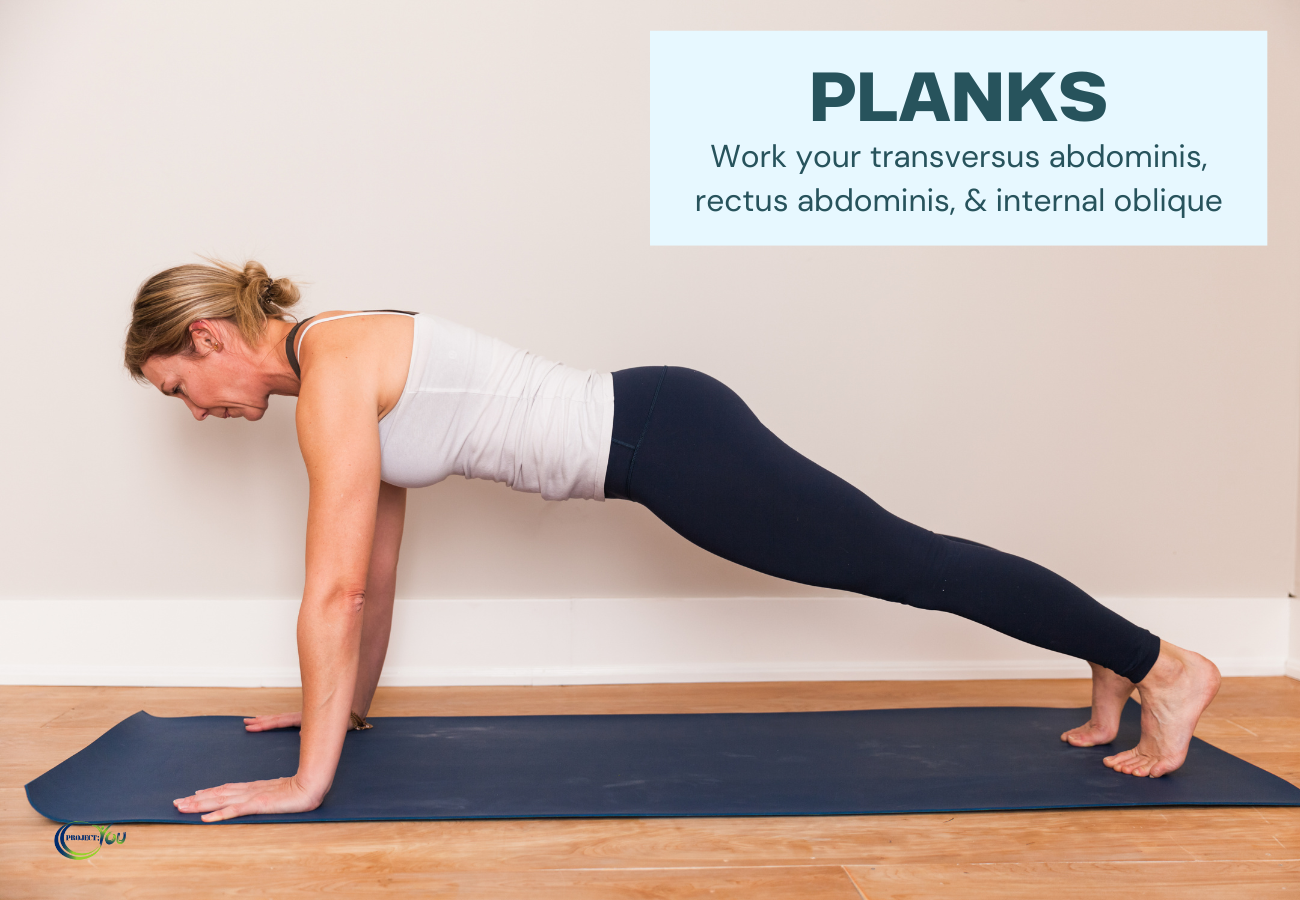
1. Setup Position
- Lie face down on an exercise mat.
- Place your forearms on the mat with elbows directly under your shoulders.
- Extend your legs straight behind you, resting on your toes.
2. Engage Your Core
- Tighten your abs, glutes, and thighs to keep your body in a straight line.
3. Hold the Position
- Maintain a neutral spine by avoiding sagging hips or raising them too high.
- Look slightly forward or down to keep your neck in alignment.
- Hold the position for 20–60 seconds, depending on your fitness level.
4. Release
- Lower your knees and rest as needed.
5. Repeat
- Perform 2–3 sets.
Tips for Proper Form
- Keep your elbows directly under your shoulders for stability.
- Avoid locking your knees or holding your breath.
- Start with shorter holds and gradually increase duration as your strength improves.
Building a strong core is essential for supporting your entire body and improving everyday movements. Whether you’re lifting, twisting, or simply standing, a well-conditioned core allows you to move with more control and stability.
The exercises we’ve covered—crunches, bird dog, bridge, Russian twist, and plank—target different muscles of your core, helping you develop strength, endurance, and balance. Incorporating these moves into your workout routine will ensure you’re engaging all areas of your core for a stronger, more functional body.
Start incorporating these exercises into your fitness routine today, and feel the difference in your strength, stability, and overall health. Follow us for more tips and workouts to keep your body in top shape!

